Sisu instructions: Study plan

The instruction belongs to the following themes

By selecting a degree programme you are able to see the general content as well as the possible degree programme-specific content. You do not have to select a degree programme to see the Open University's instructions.

Before you start drafting your personal study plan, read the instructions relevant to your degree programme on the page Personal study plan (PSP).

Drawing up a study plan in the Sisu system is a three-stage process:

  1. To create a study plan, select the page “Structure of studies”. A completed study plan will list all the studies that you need to complete in order to graduate.
  2. Schedule your studies on the “Timeline” page.  This will help you in sketching an outline of the studies you annually need to complete to graduate.
  3. Select the method of completion on the “Registration" page. You may then register for the course when the registration time begins. More detailed instructions on how to register for teaching and exams can be found here.

You will be assigned a personal PSP supervisor in Sisu. Agree with your supervisor in advance about exceptional methods of completion or exchange studies. All plans, applications and decisions pertaining to such methods will be processed through the study plan.

Both you and your supervisor can include comments on your study plan. As comments, messages, and notifications are displayed only in Sisu, you should agree on related practices with your supervisor at the outset. Student Services staff do not monitor comments, so you must contact administrative staff separately via email or other channels.

Note that the these instructions only applies to undergraduate students. Instructions on doctoral students' study plans can be found here.

When drawing up your study plan, please take the following into account

  • The study plan may not function properly on your phone or tablet. It is recommended to use a computer.
  • You need not complete the study plan at once. It is sufficient that you include in the plan those courses for which you wish to register. If you are about to graduate, the study plan must include all completed studies that are included in your degree and they need to be added in the right place in the study plan. When the study plan is complete you can submit your graduation application in Sisu.
  • You must always select a method of completion for a course in order to have the credits correctly displayed in the study plan. If you have not selected a method of completion, the credits will not be displayed in the plan.
  • In the Sisu system, you can complete several study plans, but only one can be your primary plan. You can register for courses, submit study-related applications and graduate only according to your primary study plan.
  • If you have several study plans, remember to check once in a while that you are editing the correct plan. The “Timeline” page automatically opens the most recently edited study plan under the “Structure of studies” page.
  • If you have created your study plan before 1 August 2020, you must first update it. You will notice the need to update the plan when there is the following notice in your study plan: The structure of the study plan is against the rules.  See instructions on updating an old study plan.

What is a primary study plan?

You can create one primary study plan that applies to your right to study. If you have created only one study plan, this will automatically be your primary plan. You can verify whether a study plan is the primary one from the “Structure of studies” tab. If the study plan in question is the primary plan, you will see a button reading “Primary plan” on the right side of the heading “My study plan”. 

Screenshot: primaty study plan in Sisu

When selecting your primary study plan, carefully consider your options. Sisu includes several functions which you can only perform with your primary study plan and which you cannot move to another study plan. Such functions include the following:

  • Creation of new content or content that deviates from the predetermined structure of the study plan
  • Graduation requests and graduation
  • Requests for the recognition of prior learning and related decisions
  • Applications for an extension of the right to study and related decisions

If you change your primary plan during course registration before your registration is confirmed, you will also need to re-register via the new plan.

If you wish to have another study plan as your primary plan, click on the Additional menu button with three black dots in the upper right corner of the “Structure of studies” page.  A drop-down menu will appear; click on “Select as the primary plan”.

When should I create a new primary plan?

It is not recommended to change your primary study plan to a new one lightly, because not all applications, decisions and comments possibly related to your study plan will transfer to the new study plan. In some cases, creating a new study plan might be necessary (for more information see Personal study plan).

Usually, it is enough if you change the version of a section of your study plan. Changing the version technically means that you are updating a section of your study plan to correspond with the newest degree requirements (curriculum). This way other sections of your plan will not change. You can change the version via the notification at the top of the plan or by going through the structure to the course brochure. Further instructions on how to change versions in your study plan.

Creating, printing and deleting a study plan

Creating a study plan

  1. Start drawing up your study plan by opening the Structure of studies page from the navigation pane.
    Screenshot of the main menu in Sisu.
     
  2. Click on the button “New study plan” at the top of the page.
    Screenshot: new study plan in Sisu
  3. Select “My educations ” from the pop-up window which then appears. On this tab, you can select the study plan template that applies to your right to study. If you have several study rights, the “Learning opportunity” drop-down menu will display a list of all study plan templates that correspond to the rights to study that you have been granted.
  4. In the “Curriculum period” drop-down menu, select the correct curriculum period. For first-year students, Sisu will offer the current academic year as the curriculum period. If you are not a first-year student, you can also choose an earlier period during which your study right was valid.
  5. If you wish, you can name your study plan. The default name is “My study plan” and the date of creation. If you create several study plans, you should name them clearly, so that you can tell them apart. This will help you in selecting the correct study plan later on.
  6. Finally, click on the button “Create a plan” at the bottom of the pop-up window. Your new study plan will open and be ready for editing.
    Screenshot: new study plan in Sisu
     

Printing a study plan 

You can print your study plan on paper or save it as a PDF file. The print will display the status of the study plan as well as scheduled and completed studies. Note that for the time being, study drafts are not displayed in print-outs. 

Click on the Additional menu button with three black dots in the upper right corner of the study plan. Select “Print study plan” from the drop-down menu.

If no such window pops up, you can open one by clicking on the “Print” button in the top right corner of the study plan that you wish to print. If you wish to return to the edit mode, click on the button “Go back to structure”.

Deleting a study plan

First, open the study plan that you wish to delete. Click on the Additional menu button with three black dots in the upper right corner of the study plan. In the drop-down menu, click on “Delete plan”. A pop-up window will appear asking you to confirm that you want to delete the plan. A deleted study plan will be permanently erased and cannot be retrieved.

The “Delete plan” option in the drop-down menu may be in grey font and cannot be selected. This means that you only have one study plan in the Sisu system. In such a case, you must create at least one new study plan to be able to delete the plan.

Editing and completing a study plan

First, select the study plan that you wish to edit on the “Structure of studies” page. You can change the study plan you wish to edit by clicking on the study plan heading.

Your study plan will list all the modules and courses that you need to complete in order to graduate. Elective and optional studies also have their own section in the study plan, which, however, contains no pre-filled modules or courses.

Sisu marks the courses that you have completed with a laurel wreath icon and includes the grade. A completed course will be displayed in Sisu within about 24 hours from the time the teacher has completed its assessment in the system.

Screenshot from Sisu.

Choosing a study track

Note that in some degree programmes you must select your study track before the “Structure of studies” page shows any studies. In such a case,

  1. click on the name of the degree programme, e.g., the name of a bachelor's programme, in the study plan.
  2. Turn on the Study track option in the selection assistant that opens. 
  3. Click on the Study track subheading in the plan. 
  4. Select your desired study track in the selection assistant by turning on its selection.
  5. Your study track is confirmed by your degree programme. Please note! Changing your selections at the degree program level will reset any previous selections in your study plan.

    Screenshot: editing study plan in Sisu

Planning compulsory studies

The study plan displays the pre-filled compulsory courses with their icons. For these studies, you only need to schedule them and select the method of completion. (For instructions on selecting method of completion see Sisu instructions: Registering for teaching and exams page and its chapter Registering for course units.)

You can substitute a compulsory course with another course only if you have e.g. completed an equivalent course in accordance with the previous degree requirements and under a different code, or if you wish to to substitute the course with studies completed at another institution of higher education. See further instructions for substituting studies below in the section course brochure.

Planning optional studies

Your study plan contains sections which allow you to freely select studies that you wish to complete. Generally these studies are added to the “Structure of studies” page under “Other studies” or “Optional modules”. The optional sections of the plan are indicated by the text “optional selections” to the right of the heading.

  • You can add individual optional courses under “Other studies”.
  • You can add an optional module or modules under “Optional study modules”.

You can proceed to make your selections when you click on the heading of the section you wish to open. Note that the circular button with the > symbol in front of a heading opens an accordion menu that may be empty.

Screenshot: editing study plan in Sisu

By clicking on the heading, you can open the selection assistant on the right side of the view. At the top of the selection assistant, you can see detailed instructions provided by your degree programme for making selections in the section at hand. Read the instructions carefully.

Under the heading "Add to plan", you will find a search field for looking up courses (or modules). You can also use the selection assistant to add courses or modules that you have already completed to your plan. The course that you searched for will be transferred to your study plan when you click on it in the drop-drown menu that opens in the search field. In the selection assistant, you can see the icon of the course that you selected. You can delete this selection by clicking on the Delete button which has a recycle bin icon.

Screenshot: editing study plan in Sisu

Adding content that deviates from the predetermined structure of the study plan

New content or content that deviates from the pre-determined structure may include the following:

  • Studies to be completed during a student exchange
  • Studies completed at another Finnish higher education institution
  • Studies completed at the University of Helsinki in accordance with the old degree requirements, which for some reason or another are not displayed in your study plan
  • An exemption from completing a given course

You can add new content or content that deviates from the pre-determined structure of the study plan in two ways: either in the free edit mode or by creating a study draft.

Use the free edit mode when
  • You are adding a course that has been completed or recognised or a course to be completed at the University of Helsinki, and
  • the course or module in question can be found through the search function of the selection assistant, and
  • you are not able to add the course or module to the study plan in the place that you would like it to be. 

Please note that before you do any changes in the free edit mode, check that the course is marked as substituting course in the place in the study plan where you would like to add it. You can check it on the Substitutions tab in the course brochure. More information is available in the Course brochure section.

See instructions on how to use the free edit mode.

Create a study draft when
  • The studies are to be completed or have been completed in a university other than the University of Helsinki, e.g., during an exchange period abroad or in another Finnish institution of higher education, and
  • The credits have not yet been recognised by the University of Helsinki.

See instructions on how to use the study draft to plan exchange studies.

Adding missing course credits to the study plan

All the studies you have completed may not automatically be displayed in the study plan, and may have to be added manually.

Please note that in some cases the completed credits transferred from WebOodi to Sisu are shown with incorrect codes. If this is the case, see the instructions on the page Potential issues with information transferred from Oodi.

Credits missing from optional studies

Under the bar “Add to the plan” on the left-hand side of the “Structure of studies” page, you can find all the courses that are not included in your study plan. You can move courses to optional studies (or optional study modules) by clicking on the arrow. Similarly, if you delete a course from your study plan, you can then find it among the courses listed under the “Add to the plan” bar. 

Screenshot: add to the plan in Sisu

Credits missing from compulsory studies

If you wish to substitute a compulsory or an alternative course with a previously completed course (e.g., a course completed under a different code, in accordance with the previous degree requirements), verify from the course brochure whether the course you have completed is indicated as a substituting course. The substitution need not be submitted for approval. For detailed instructions about substitution, see the Course brochure section of this page.

If the course you have completed is not indicated as a substituting course, you can apply for credit transfer. To apply for credit transfer, use the selection assistant and the free edit mode. See instructions for using the free edit mode.

The course brochure

In the study plan, each compulsory or optional course has its own course code. By clicking on the code, you can access the relevant course brochure that describes the methods of completion.
Screenshot: course brochure in Sisu

The course brochure has three tabs:

  • The Information sheet provides a general description of the course, including information on the course content and dates.
  • The Completion methods tab indicates the course completion methods, which may include lectures, online examinations or a hybrid course completion method. Select the method of completion after you have first drafted a timetable for your studies on the “Timeline” page. This enables you to conveniently find the courses that you entered in the timeline on the “Study calendar” page (see item “Study calendar” in these instructions).
  • The Equivalences and substitutions tab provides a list of equivalent courses, if any. If you already have completed or intend to complete an equivalent course (e.g., at the Open University), click on the radio button next to the equivalent course. The change is saved immediately and you can then exit the brochure by clicking the Close information sheet button in the upper right corner. The substitution is now displayed in your study plan, replacing the icon of the original course. You can cancel the substitution by clicking the Substitutions button which has an icon with two arrows pointing in opposite directions, and then clicking the Edit button in the pop-up window.
    • Use the Equivalences and substitutions tab to submit an application for credit transfer when you wish to substitute a course with studies completed elsewhere. See instructions on applying for a credit transfer in Sisu. Please note! Application for credit transfer is only required if a course is completed in a different institute of higher education or it is a part of another degree completed at the University of Helsinki. Otherwise, use the free edit mode.
Screen capture of the Equivalences and substitutions tab on the course brochure..

Planning the timeline of your studies

On the “Timeline” page, you indicate the academic year and teaching period in which you plan to complete the courses in your study plan. Please note that the timeline is there to support your own planning, it does not affect the approval of course registrations, for example.

Screenshot from the main menu of Sisu.

Completed courses previously included in your plan are automatically displayed.  By default, the system will open on the Timeline page the study plan most recently edited by you on the “Structure of studies” page. You can change the study plan by clicking on the study plan heading. From the drop-down menu that opens, select the study plan that you wish to edit.

If applicable, use a timing template in planning for studies. The “Timing template” menu is on the left side of the Timeline page. Your degree programme will issue detailed instructions for using the template.

  • The template will guide you to select your studies in a pre-determined order.
  • Using the template will lead to fewer incidents where the courses that you plan to complete will overlap.
  • The template will not force you to do anything, but it will provide a timetable for the courses that you have included in your study plan.

    Screenshot: timing template in Sisu

If you wish, you can time courses individually. Open the menu “Add unscheduled courses to the timeline” at the bottom of the page. In this menu, you can transfer the courses that you plan to complete to your timeline according to your own needs. Always verify the course timetable from the course brochure before you add courses to the timeline without using the template.

Screenshot: add courses to the timeline in Sisu


The study calendar

On the Study Calendar page, you can

  • go to register for courses and exams,
  • add your own calendar entries, and
  • export the calendar you see there to your own electronic calendar.

Please note that registration for classes and exams is primarily done through the Registration page. Instructions for registration can be found on page Sisu instructions: Registering for teaching and exams.

screenshot: navigation pane in Sisu.

To the right of the study calendar, you can see a black sidebar with the following three tabs:

  • The “Teaching not selected” tab lists the brochures for those courses for which you have not selected teaching, examinations or other methods of completion. 
  • On the “Registration” tab, you can see the teaching or exams you have already chosen and you can register for.
  • The “Finished and discontinued” tab displays courses that have ended or that you have discontinued. You cannot re-register in a discontinued course.

Remove teaching from the calendar

Teaching events for entire implementations or their teaching groups remain visible in the calendar if you are not selected for the implementation or a particular teaching group. Below are the instructions for removing the selection of an entire implementation, followed by the instructions for removing individual teaching group sessions from the calendar. 

You can hide events that appear as cancelled in the calendar by clicking the checkbox Hide cancelled events located above the calendar.

You can remove the selection of an entire implementation via the study calendar using the instructions below. You can also see all the implementations you have chosen on the Registration page and remove their selections directly from the information box of that particular implementation. 

  1. Find a teaching event of the implementation in your calendar. 
  2. Click on an event in the calendar. 
  3. Select the Open the course information sheet button from the window that appears.
  4. Scroll to the top of the course information sheet and click on the Delete selection button on the right side of the implementation in the completion method matrix.

    Screen capture of the completion method matrix and Delete selection button.

Removing the selection of an individual teaching group from the calendar is possible via the selection assistant on the right side of the study calendar.

  1. Open the Registration tab.
  2. Find the desired implementation on the tab and open its details by clicking the arrow button.
  3. Remove the Show events in the calendar option for the teaching group you want, found under the Time and location info text. 

    Screen capture of the Show events in the calendar option.


Calendar entries and exporting the calendar

You can also include personal appointments in your study calendar by clicking on Add a note at the top of the page. A pop-up window will appear where you can add the details of your personal note. You can also make the note recurring for the time period you desire.

You can also export the notes in your study calendar, for example, to your Outlook calendar by clicking on Export into external calendar and copying and pasting the link provided into your browser address bar. Then select the program with which you wish to open the calendar file. Please note that only the notes included in your study calendar at the time will be transferred.
 

Screen capture of the buttons on the Study calendar page.

Searching for courses and study modules

Sisu offers you two search functions for looking for courses. The more simple function is the selection assistant that opens on the “Structure of studies” page. A more sophisticated search function is available from the top bar, on the “Search” page. Please note that registering for courses through the Search page often leads to problems when registering for teaching and exams due to a wrong version of the course.

You can also use the Studies service to search upcoming courses and exams. For more instructions on how to search courses and exams, see Where can I find courses?

Searching for courses and study modules using the selection assistant

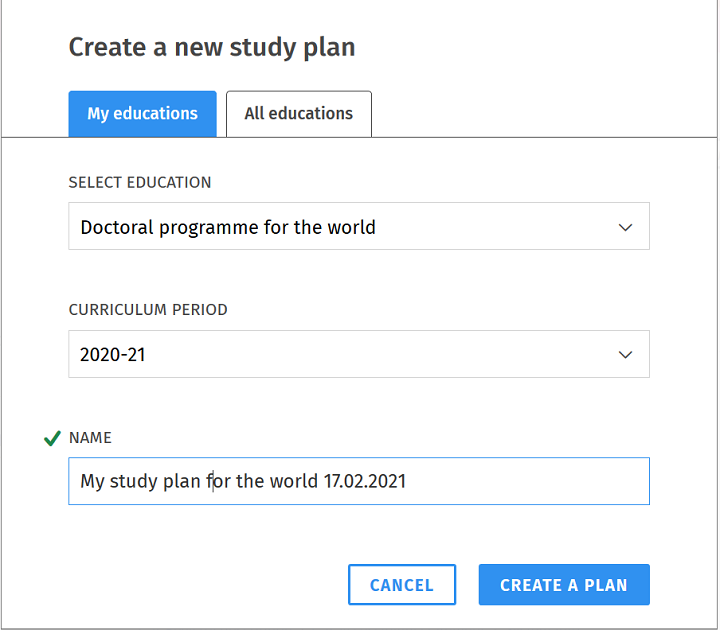
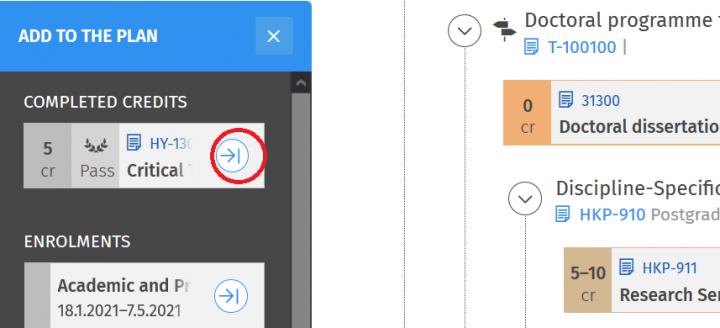
You can use the selection assistant on the "Structure of studies" page. The selection assistant offers you the opportunity to search for courses or modules and include them directly in your study plan. The selection assistant will display the search field only if it is possible to add other studies to the section that you have clicked on. When doing a search, if you select any courses or modules, these will simultaneously be added to your study plan.

Beginning from the degree programme versions for the academic year 2023–24, the search for optional study modules has been limited to modules that the degree programme or study track offering the module has classified as suitable for students of other degree programmes or study tracks. If the restriction applies to your plan, you will see the instructional text "Search only for minors" below the search field for modules. You can read more about versions on the page Sisu instructions: Updating a version of a course or a study module in the study plan.

Screen capture of the study module search with the text about restriction to minors only.

On the “Structure of studies” page, first click on the name of the section that allows you to add studies. The selection assistant will open on the right side of the study plan. Below the heading "Add to plan", you will see a search field that you can use to search for and add individual courses or modules to your study plan.
Screenshot: search in Sisu

In addition to choosing your optional study modules, you must also confirm them as a part of your study right. You are free to plan different modules and only confirm your selections once you have decided which modules you want to complete.

If in the selection assistant it says 'Selection requires confirmation', you can confirm the selection yourself by following the instructions below.

  1. Click on the minor subject's row in your study plan to open the module selection assistant on the right-hand side of the page.
  2. Click on the Show link at the top of the selection assistant to open the confirmation window.
  3. Click 'Yes, confirm selection' in the window.

If in the selection assistant it says 'A separate application for a study right is required', you must apply for a study right separately in order to complete the studies in the module. You can read more about optional studies and the application procedures that may apply to them on the subpages of the Optional studies theme page.

If you no longer want to complete the selected and confirmed study module, it is sufficient to remove it from your plan. Click on the title above the study module to open the selection assistant on the right hand side. Remove the module with the Delete button, which has a trash can icon. It is not necessary to delete the associated study right; removing the module from the plan is enough.


Searching for courses and study modules on the Search page

It is recommended that you use the Search page when you wish to do a search using filters. The filters available on the Search page include the language of completion, method of completion and the teaching period, among others. If you wish, you can also browse courses offered by other universities in the Sisu system. Note, however, that you cannot register for courses offered by other universities without the relevant right to study.

NB! Do not register for teaching and exams through the Search page or you might risk your registration to be rejected automatically due to having a wrong version of the course. Always add the course to your study plan first, then you can choose the method of completion and register for the course units on the Registration page.

Screenshot of the main menu in Sisu.

Basic search

When you enter a search term in the search field, e.g., “world”, Sisu will list all courses with the word “world” in the course title. Before the search field, there is the text “University of Helsinki”. If you wish, you can click on the text, select another university from the Sisu network, and browse their courses.
Screenshot: search in Sisu

Filtering search results

Below the search field, you will see the filters. By clicking on one of the available filters, you can open a drop-down menu displaying the relevant filtering options, such as languages of completion.

Screenshot: search in Sisu

When you have made your selections, the results are filtered automatically. The selected filtering criteria will be displayed in black boxes on the drop-down menus.

If there are more results than what Sisu can retrieve, the notification “Too many results, please specify your search” will appear. In such a case, specify the text you entered in the search field or add more filters by clicking on the “Filter” button.

Personal study plan (PSP) supervision

The study plan in Sisu enables receiving and providing supervision and guidance in two ways:

  • Both the student and supervisor can either comment on the plan on a general level or in closer detail with reference to certain courses or modules.
  • Students and supervisors can agree on the addition of new content or content deviating from the pre-determined structure, such as a student exchange period, into the study plan. Please note, when adding studies that deviate from the degree structure to the study plan, it is a suggestion. The final approval takes place through a digital application in Sisu.

Note that comments are only displayed in the study plan where they were included in the first place. As comments, messages, and notifications are displayed only in Sisu, you should agree on related practices with your supervisor at the outset. Student Services staff do not monitor comments, so you must contact administrative staff separately via email or other channels. You can find their contact information on the Student Services page.

Who is my supervisor?

To find out the name of your supervisor, open “My profile” in the main menu of Sisu.

Click on the “Groups” tab. The tab lists all the groups that you are included in, detailing the group name, type (tutoring group) and coordinator (your PSP supervisor). 

Please note that you might also see tutoring groups that are named e.g. "Metsätalo applications". These groups are formed by the student services for administering student applications. Comments and questions on the study plan submitted through these groups are not read and will not be answered.

Screenshot: my profile in Sisu

Commenting on the study plan

Comments to the study plan are included under the Structure of studies tab. At the top right corner of the study plan, you can see the “Guidance” button. When you click on it, the guidance view opens.

Screenshot: 'Guidance'-button in Sisu

Under the heading "Message type" you can access a drop-down menu, where you can select your comment type to be either a “general comment” or a "specific comment”. A general comment relates to the study plan in general. A specific comment relates to a specific course or module in the study plan. Please note that sensitive personal data should not be written in the comments!

Screenshot: commenting study plan in Sisu

If the “Send” button is grey, your comment is incomplete. In such a case, check that you have selected the message type and entered your comment in the text field. Also check that you have ticked the appropriate box, indicating that you understand that the comment should not include sensitive personal data.

Video instructions